Toyota Camry 2007-2011: Suspension Noise Diagnostic Guide
Rattles, pops, clunks and bangs are indicative of a suspension problem. There are varying degrees of issue, ranging from "annoying but safe" to "unsafe, pull over immediately." If you're not sure which camp your issue falls under, you should take care to find out sooner rather than later.
This article applies to the Toyota Camry (2007-2011).
As it left the factory, your Toyota Camry had a quiet, comfortable ride, designed for many miles without issue. However, like many things on automobiles, most suspension parts can be categorized as "wear and tear" components, requiring periodic replacement. If your suspension has become abnormally noisy and uncomfortable, you've likely got an issue. Squeaks, clunks, bangs, pops and rattles can all occur when the various suspension components wear out on your vehicle. Read up on the common problems below, and help troubleshoot your Camry's suspension issues.

Materials Needed
- Jack
- Jack stands
- Flashlight
- Metric socket set and ratchets
- Breaker bar or torque wrench
- Paper towels or rags
Step 1 – Check wheel bearings
Worn wheel bearings cause a howling noise.
The wheel bearings are situated in the wheel hub of your suspension, which is where the wheel mounts up. The bear is there to let the hubs spin freely and take knocks and bumps without seizing up. When the bearing wears, it will begin to make a howling noise that increases with speed as the hubs spin faster.
- With the vehicle on the ground, grab your tire at the "9 and 3" position and then give it a vigorous shake.
- Repeat this process, this time grabbing the wheel closer to "11 and 5."
- Rinse and repeat for each wheel.
A worn wheel bearing will cause the wheel to wobble and clunk excessively when shook like in the test above. If your wheels do exhibit this tendency, the wheel bearings require replacement. Wheel impacts, like large potholes and contact with curbs, can cause wheel bearings to fail prematurely.
Pro Tip
If you have a worn wheel bearing, consider replacing in an axle pair, i.e. the front left and front right, instead of the individual bearing. Replacement requires a wheel alignment afterwards, so replacing both bearings at once saves on this cost should the other bearing also fail prematurely.
Featured Video: How to Replace 2009 Camry Front Wheel Bearing
If the wheel bearings check out, it's time to get underneath the car and begin poking around for the problem.
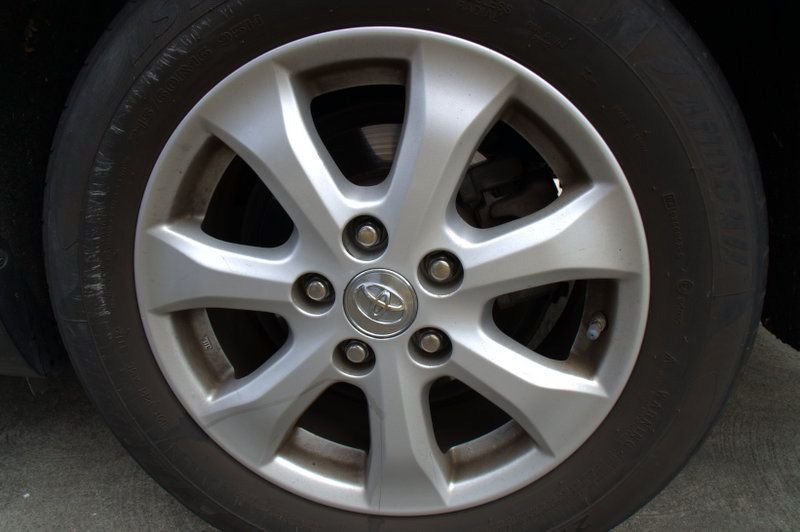
Step 2 – Remove wheels
Wheels that have come out of round will cause a rhythmic thumping noise.
Wheels take a beating in the daily commute. They are protected only by a few inches of rubber, and can be bent or damaged with a large enough impact.

- Loosen (do not remove!) the wheel lug nuts with the vehicle on the ground.
- Jack the car up and set it on jack stands.
- Remove the wheels.
- Visually inspect the barrels or backside of the wheel for visible bends, cracks or distortions.
- Also check for indications of missing wheel weights; the adhesive used to affix them can fail in extreme temperatures.
If your wheels appear to have any minor bends in them, fret not. Usually, they can still be serviced. Take the car to your local wheel and tire service shop and explain that you have a wheel with a minor bend, and ask for their technicians to see if it can be balanced into spec. Alternatively, wheels can be straightened and repaired for a reasonable cost.
(Related Article: How to Jack Up Your Car - CamryForums.com)
Featured Video: How to Spot a Bent Wheel
If your wheels and tires look okay, it's time to revisit the suspension.
Step 3 – Check struts
They could be leaking.
The Camry utilizes a strut-type suspension at all four corners. Struts (commonly referred to as shocks) are a wear and tear item, subject to periodic replacement. Some 2007-2011 Camry owners have reported very short intervals before the original equipment struts wore out. When struts wear out, the suspension will become abnormally bouncy, as the struts become unable to control body motions. It is very common for worn struts to clunk when the car hits a bump, as the blown shock no longer has fluid inside of it to dampen the bump.
Since you still have the car on jack stands, with the wheels removed from the last step, giving the shocks a visual inspection is very simple.

- Shine a light on the struts, and look for evidence of grime buildup. When struts fail, the fluid inside begins to leak out of the shock body, causing them to become noisy.
- Take a rag or paper towel and wipe off any grime on the struts, looking for evidence of oil or fluid loss.
- Alternatively, if you never lifted the car off the ground initially, you can also test the struts by pushing down on the car's fenders. Watch for excessive bounciness or, again, noise.
If your shocks are leaking, they require replacement. A wheel alignment is strongly recommended after installing new shocks, as the disassembly and replacement process throws the alignment settings out of whack. The replacement process for the struts is the same as many previous Camry models, all the way down to the mid-90's, and is generally pretty painless, even for a novice mechanic.
Featured Video: How to Replace Camry Rear Struts
If your struts are okay, it's time to check the most common offender of suspension noise.
Step 4 – Check bushings and ball joints
Aged bushings allow excess suspension noise and can cause all sorts of noises.
Your Camry's suspension is all rubber-mounted, meaning that there are a series of rubber bushings throughout the front and rear suspension of the vehicle. Give the rubber a visual inspection, looking for dryrotting, tears, and excessive play or movement.
Check the sway bar endlinks and sway bar chassis mounting bushings. As the bar tenses and moves, these items can wear out.
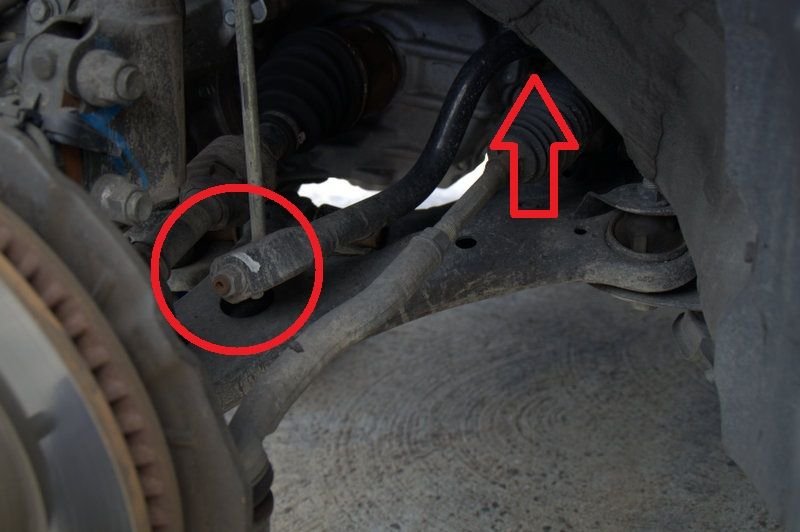
Check all additional rubber chassis bushings for indicators of failure, as noted above.
Your vehicle has bushings like these in the front and rear suspension. Get your flashlight handy and give the whole underside of the car a visual inspection. Worn bushings are malleable and can often be moved around by hand. If this describes any of your bushings, you've found the problem.
If your issue is neither clunk nor bang, pop, or groan, there's one more thing to check.
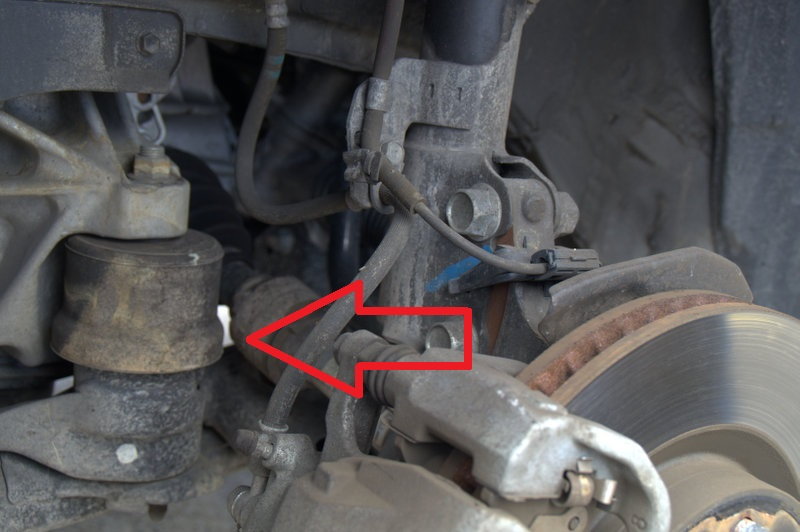
Step 5 – Inspect half shafts (axles)
Worn axles make a clicking sound as they rotate.
The CV (constant velocity) joints, commonly referred to as axles, can also fail. Usually, the protective boot on the CV will tear, causing the lubricating grease within to run dry or collect contaminants, gumming up the axle and eventually causing failure.

- Visually inspect the axles and the rubber boot.
- Look for tears in the boot.
- Look for cracks in the axle itself.
- Ensure that the axle is fully seated inside the transmission (look for fluid leaks).
- Give the axle a good shake.
If your axle shows signs of the failures noted above, it requires replacement. It's highly advised to replace both axles at once, as the repair can be rather intensive. This is definitely one of those "do it once, do it right" kind of jobs.
Featured Videos: Toyota Camry Axle Replacement
-
Driver's Side Axle
-
Passenger Side Axle
Related Discussions
- Front End Knock and Creak - CamryForums.com
- Intermediate Shaft Clunking Noise - CamryForums.com
- Front Suspension Noise - CamryForums.com
- Struts Replaced, Noise Persists - CamryForums.com
- Strut Mount Problems - CamryForums.com